> ## Documentation Index
> Fetch the complete documentation index at: https://docs.celesto.ai/llms.txt
> Use this file to discover all available pages before exploring further.
# Disposable macOS environments
> Create a disposable macOS desktop on an Apple Silicon Mac, open it with Screen Sharing, share local folders, and delete it when you finish.
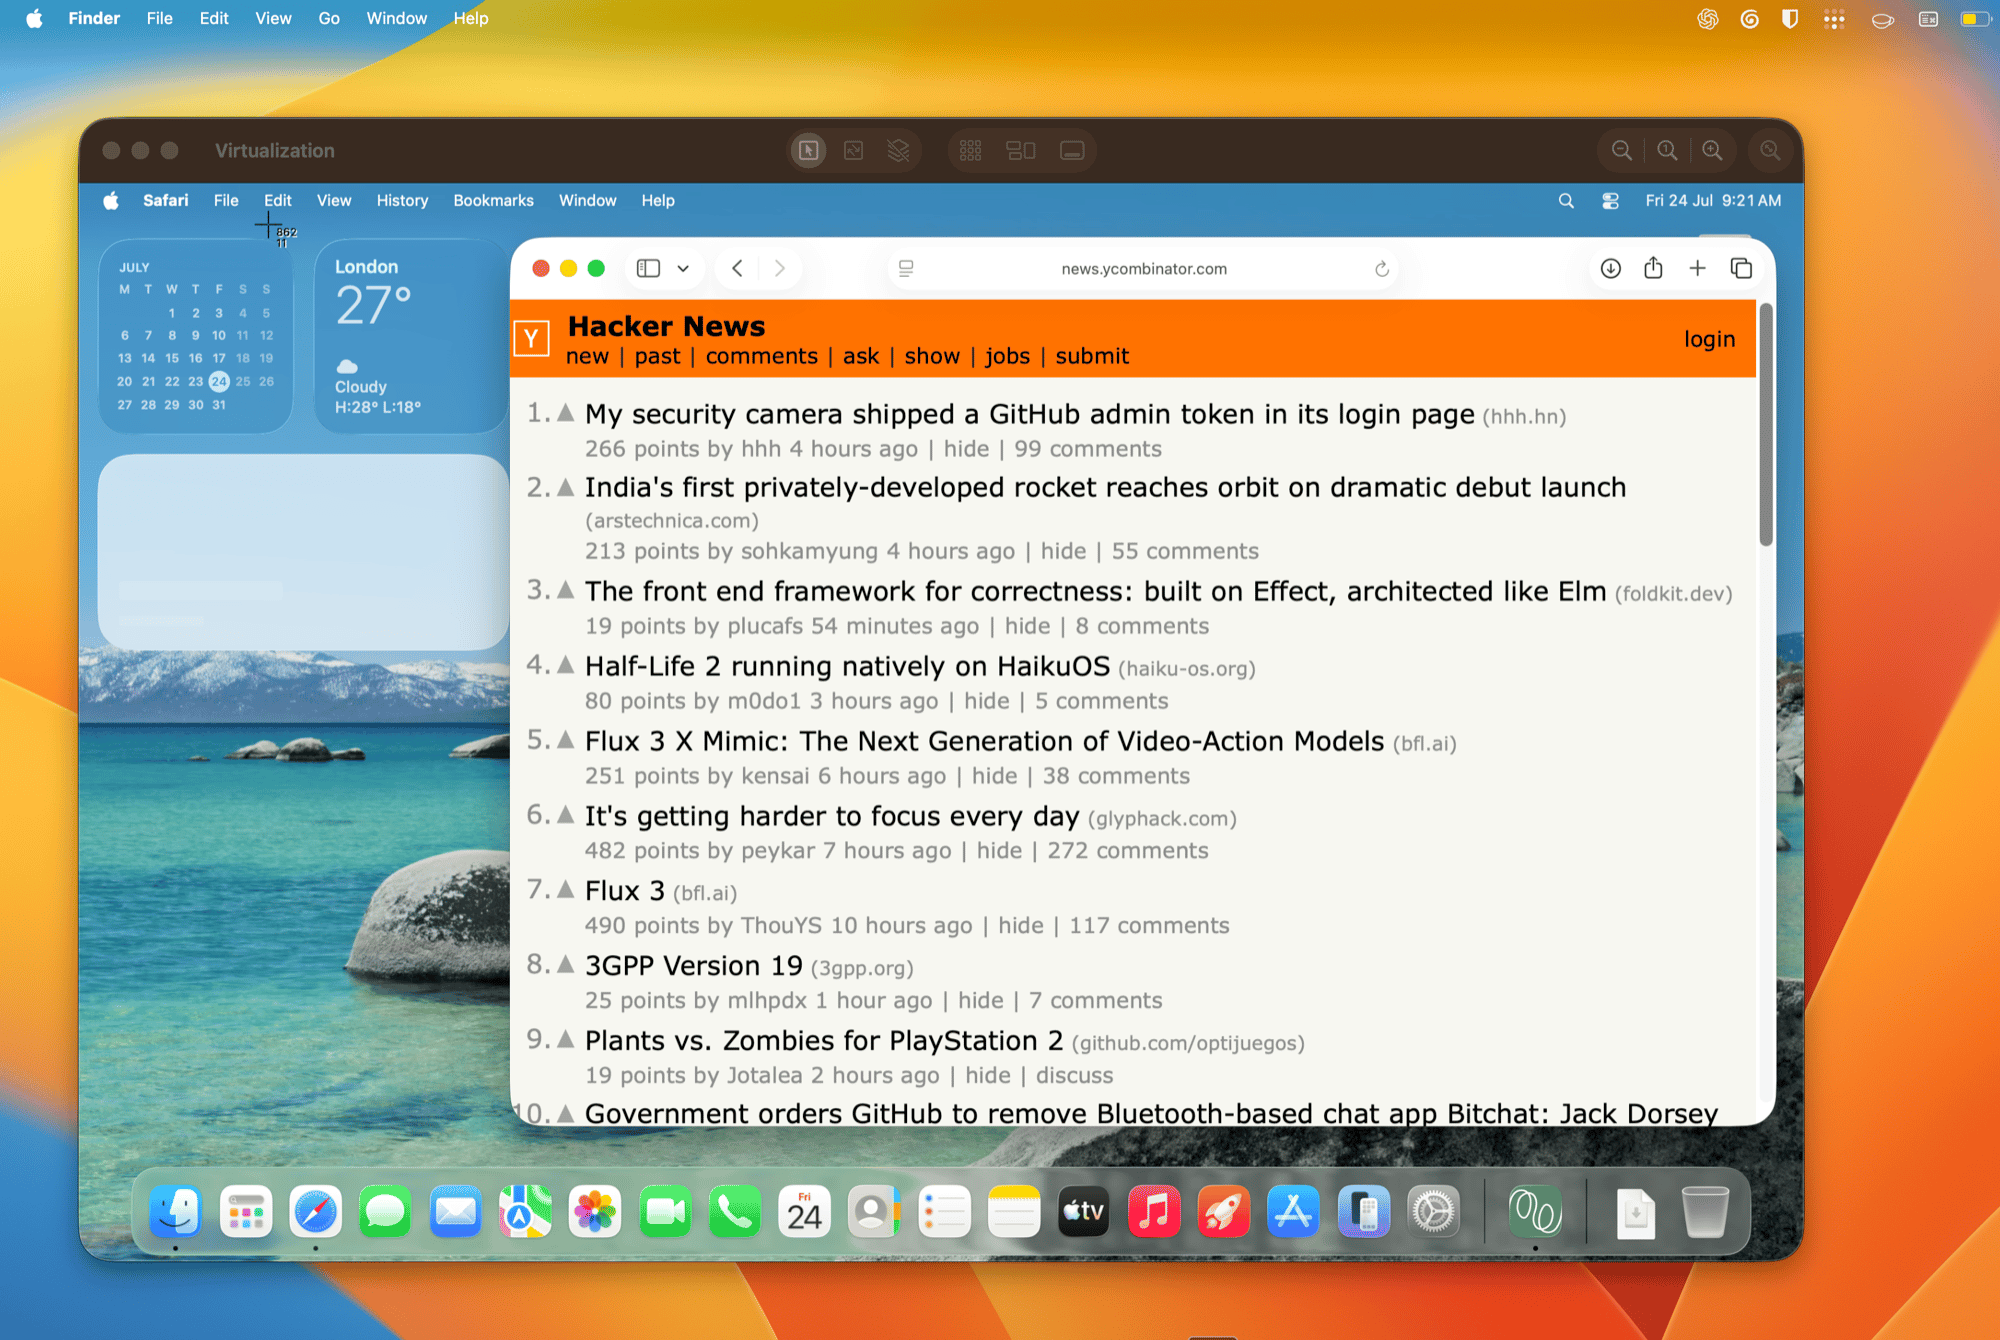
A macOS sandbox gives you a temporary Mac desktop for testing apps, opening installers, and trying changes away from your everyday system. It runs locally on your Apple Silicon Mac and opens in Apple's built-in Screen Sharing app.
 ## What you can do
* Open and use a full macOS desktop.
* Test apps and installers, including apps distributed in `.dmg` files.
* Share a local folder with read-only access by default.
* Stop and restart a sandbox without losing its private files.
* Delete the sandbox to discard its apps, files, and changes.
* Reuse one prepared macOS image to create later sandboxes quickly.
SmolVM keeps System Integrity Protection, Gatekeeper, and normal macOS permission prompts enabled. Apps behave as they would on a regular Mac.
## Before you start
You need:
* An Apple Silicon Mac
* macOS 14 or newer
* About 50 GB of free space for the first image preparation
* An APFS volume, the standard file system on modern Macs
* SmolVM installed locally using the [installation guide](/smolvm/installation)
The first image preparation downloads an Apple restore file of about 15–18 GB. Download and installation usually take 20–40 minutes, depending on your connection and Mac.
The Apple restore file and prepared macOS image stay on the Mac where you create them. Image publishing, export, and transfer are unavailable for macOS images.
## Create your first macOS sandbox
After the one-time setup, you only need two commands: create the sandbox, then open its desktop.
Install the tested macOS desktop runtime:
```bash theme={null}
smolvm setup --macos
```
Check that your Mac is ready:
```bash theme={null}
smolvm doctor --backend vz
```
`vz` is the local runtime that uses Apple's built-in virtualization support.
Continue when the doctor summary shows `Result: OK` and `Failures: 0`.
Create a sandbox named `nimble-mac`:
```bash theme={null}
smolvm sandbox create --os macos --name nimble-mac
```
On the first run, SmolVM asks before downloading and preparing macOS. Enter `y` to continue. The progress bar follows the download, installation, and desktop setup.
```text theme={null}
No local macOS image is ready. SmolVM will download macOS from Apple...
Continue? [y/N]: y
```
When creation finishes, the sandbox is already running. The output includes the next command. Your start time will differ:
```text theme={null}
╭─────── VM Created ───────╮
│ Created VM 'nimble-mac'. │
╰──────────────────────────╯
VM Details
┌─────────┬─────────────────────────┐
│ Name │ nimble-mac │
│ Status │ running │
│ OS │ macos │
│ Started │ 2026-07-24 18:08:50 UTC │
└─────────┴─────────────────────────┘
Next: smolvm sandbox desktop nimble-mac
Info: smolvm sandbox info nimble-mac
```
If installation fails after the download completes, run the same command again. SmolVM keeps the completed restore file and reuses it instead of downloading another copy.
Run the `Next` command from the create output:
```bash theme={null}
smolvm sandbox desktop nimble-mac
```
SmolVM opens Screen Sharing and confirms the connection:
```text theme={null}
Opened the desktop for sandbox 'nimble-mac'.
```
SmolVM supplies the private Screen Sharing password automatically. At the macOS login screen, use:
* **Username:** `lume`
* **Password:** `lume`
The fixed guest login is a preview limitation. Keep the sandbox local and avoid sensitive accounts or data.
## Share a local folder
Create a new sandbox that can read your current folder:
```bash theme={null}
smolvm sandbox create --os macos --name shared-mac --mount "$PWD"
```
Open Finder inside the sandbox to access the shared folder. The sandbox receives read-only access by default.
Allow changes only when the sandbox needs to edit your local files:
```bash theme={null}
smolvm sandbox create --os macos --name editing-mac --mount "$PWD" --writable-mounts
```
A writable shared folder lets apps inside the sandbox change or delete files in that folder. Share only the files needed for the task.
## Stop, reopen, and discard the sandbox
Stop the sandbox when you want to keep its private files for later:
```bash theme={null}
smolvm sandbox stop nimble-mac
```
Start it and open the desktop again:
```bash theme={null}
smolvm sandbox desktop nimble-mac --start
```
Delete it when you want to discard its installed apps, files, and other changes:
```bash theme={null}
smolvm sandbox delete nimble-mac
```
The reusable macOS image remains after deletion, so the next sandbox starts much faster.
Deleting a sandbox removes its private desktop. The reusable base image and files in read-only shared folders remain available.
## Prepare the image ahead of time
Run the long preparation step before you need your first sandbox:
```bash theme={null}
smolvm image build --os macos --ipsw latest -t macos-latest
```
SmolVM uses the macOS image's fixed size and selects `vz` automatically. Run the command as shown; `--size-mb` and `--backend` are available for Linux image builds instead.
SmolVM downloads the latest compatible restore file from Apple, installs it locally, and prepares the desktop account. Later `sandbox create` commands reuse this image.
List local images:
```bash theme={null}
smolvm image list
```
Remove the reusable macOS image when you no longer need it:
```bash theme={null}
smolvm image rm macos-latest
```
Removing the image frees its local storage. The next macOS sandbox must prepare a new image.
## How it works
SmolVM keeps one reusable macOS base image. Each sandbox receives a fast APFS clone, a private copy that stores only its own changes.
This means:
* Installing an app in one sandbox does not add it to the base image.
* Two sandboxes do not share their private changes.
* Stopping a sandbox keeps its changes.
* Deleting a sandbox discards its private clone.
The Screen Sharing connection listens on `127.0.0.1`, an address that only your Mac can reach. Screen Sharing uses VNC. SmolVM stores the generated connection password in the sandbox's private files and keeps it out of commands, logs, and API responses.
### Lume
SmolVM uses [Lume](https://github.com/trycua/cua/tree/main/libs/lume) behind the scenes to prepare and run the macOS desktop. Lume is an open-source project that works with Apple's built-in system for running virtual Macs.
`smolvm setup --macos` installs the tested Lume version for you, and SmolVM handles it through the commands in this guide. The `lume` login name comes from the desktop account that Lume creates during automatic setup.
## Preview limits
* You can run at most two macOS sandboxes at the same time.
* Each sandbox uses 4 CPU cores, 8 GB of memory, and an 80 GB logical disk. Custom sizes are not available yet.
* Shell commands, SSH sessions, file transfer commands, and SSH tunnels are not available through SmolVM for macOS guests yet.
* Bridge networking, outbound-domain rules, pause and resume, snapshots, and browser sessions are not available for macOS guests yet.
* The prepared image and sandbox clones remain tied to the local Mac.
Review [Apple's software license agreements](https://www.apple.com/legal/sla/) and use a Mac you own or control for permitted development and testing.
## Troubleshooting
Enter only `y` or `n` at `Continue? [y/N]:`. For unattended scripts, approve the one-time image preparation explicitly:
```bash theme={null}
smolvm sandbox create --os macos --name nimble-mac --yes
```
Run the create command again. SmolVM stores a completed restore download under `~/.smolvm/images/macos/.downloads/` and reuses it for the next installation attempt.
Confirm that the sandbox is running, then allow more time for startup:
```bash theme={null}
smolvm sandbox desktop nimble-mac --start --boot-timeout 120
```
Reinstall the tested runtime and check it again:
```bash theme={null}
smolvm setup --macos
smolvm doctor --backend vz
```
Apple allows at most two running macOS virtual machines on supported hardware. Stop one sandbox, then start the other:
```bash theme={null}
smolvm sandbox stop nimble-mac
```
## Next steps
Review the sandbox creation options
Control read-only and writable folder access
Start, stop, inspect, and delete sandboxes
Understand isolation and local access
## What you can do
* Open and use a full macOS desktop.
* Test apps and installers, including apps distributed in `.dmg` files.
* Share a local folder with read-only access by default.
* Stop and restart a sandbox without losing its private files.
* Delete the sandbox to discard its apps, files, and changes.
* Reuse one prepared macOS image to create later sandboxes quickly.
SmolVM keeps System Integrity Protection, Gatekeeper, and normal macOS permission prompts enabled. Apps behave as they would on a regular Mac.
## Before you start
You need:
* An Apple Silicon Mac
* macOS 14 or newer
* About 50 GB of free space for the first image preparation
* An APFS volume, the standard file system on modern Macs
* SmolVM installed locally using the [installation guide](/smolvm/installation)
The first image preparation downloads an Apple restore file of about 15–18 GB. Download and installation usually take 20–40 minutes, depending on your connection and Mac.
The Apple restore file and prepared macOS image stay on the Mac where you create them. Image publishing, export, and transfer are unavailable for macOS images.
## Create your first macOS sandbox
After the one-time setup, you only need two commands: create the sandbox, then open its desktop.
Install the tested macOS desktop runtime:
```bash theme={null}
smolvm setup --macos
```
Check that your Mac is ready:
```bash theme={null}
smolvm doctor --backend vz
```
`vz` is the local runtime that uses Apple's built-in virtualization support.
Continue when the doctor summary shows `Result: OK` and `Failures: 0`.
Create a sandbox named `nimble-mac`:
```bash theme={null}
smolvm sandbox create --os macos --name nimble-mac
```
On the first run, SmolVM asks before downloading and preparing macOS. Enter `y` to continue. The progress bar follows the download, installation, and desktop setup.
```text theme={null}
No local macOS image is ready. SmolVM will download macOS from Apple...
Continue? [y/N]: y
```
When creation finishes, the sandbox is already running. The output includes the next command. Your start time will differ:
```text theme={null}
╭─────── VM Created ───────╮
│ Created VM 'nimble-mac'. │
╰──────────────────────────╯
VM Details
┌─────────┬─────────────────────────┐
│ Name │ nimble-mac │
│ Status │ running │
│ OS │ macos │
│ Started │ 2026-07-24 18:08:50 UTC │
└─────────┴─────────────────────────┘
Next: smolvm sandbox desktop nimble-mac
Info: smolvm sandbox info nimble-mac
```
If installation fails after the download completes, run the same command again. SmolVM keeps the completed restore file and reuses it instead of downloading another copy.
Run the `Next` command from the create output:
```bash theme={null}
smolvm sandbox desktop nimble-mac
```
SmolVM opens Screen Sharing and confirms the connection:
```text theme={null}
Opened the desktop for sandbox 'nimble-mac'.
```
SmolVM supplies the private Screen Sharing password automatically. At the macOS login screen, use:
* **Username:** `lume`
* **Password:** `lume`
The fixed guest login is a preview limitation. Keep the sandbox local and avoid sensitive accounts or data.
## Share a local folder
Create a new sandbox that can read your current folder:
```bash theme={null}
smolvm sandbox create --os macos --name shared-mac --mount "$PWD"
```
Open Finder inside the sandbox to access the shared folder. The sandbox receives read-only access by default.
Allow changes only when the sandbox needs to edit your local files:
```bash theme={null}
smolvm sandbox create --os macos --name editing-mac --mount "$PWD" --writable-mounts
```
A writable shared folder lets apps inside the sandbox change or delete files in that folder. Share only the files needed for the task.
## Stop, reopen, and discard the sandbox
Stop the sandbox when you want to keep its private files for later:
```bash theme={null}
smolvm sandbox stop nimble-mac
```
Start it and open the desktop again:
```bash theme={null}
smolvm sandbox desktop nimble-mac --start
```
Delete it when you want to discard its installed apps, files, and other changes:
```bash theme={null}
smolvm sandbox delete nimble-mac
```
The reusable macOS image remains after deletion, so the next sandbox starts much faster.
Deleting a sandbox removes its private desktop. The reusable base image and files in read-only shared folders remain available.
## Prepare the image ahead of time
Run the long preparation step before you need your first sandbox:
```bash theme={null}
smolvm image build --os macos --ipsw latest -t macos-latest
```
SmolVM uses the macOS image's fixed size and selects `vz` automatically. Run the command as shown; `--size-mb` and `--backend` are available for Linux image builds instead.
SmolVM downloads the latest compatible restore file from Apple, installs it locally, and prepares the desktop account. Later `sandbox create` commands reuse this image.
List local images:
```bash theme={null}
smolvm image list
```
Remove the reusable macOS image when you no longer need it:
```bash theme={null}
smolvm image rm macos-latest
```
Removing the image frees its local storage. The next macOS sandbox must prepare a new image.
## How it works
SmolVM keeps one reusable macOS base image. Each sandbox receives a fast APFS clone, a private copy that stores only its own changes.
This means:
* Installing an app in one sandbox does not add it to the base image.
* Two sandboxes do not share their private changes.
* Stopping a sandbox keeps its changes.
* Deleting a sandbox discards its private clone.
The Screen Sharing connection listens on `127.0.0.1`, an address that only your Mac can reach. Screen Sharing uses VNC. SmolVM stores the generated connection password in the sandbox's private files and keeps it out of commands, logs, and API responses.
### Lume
SmolVM uses [Lume](https://github.com/trycua/cua/tree/main/libs/lume) behind the scenes to prepare and run the macOS desktop. Lume is an open-source project that works with Apple's built-in system for running virtual Macs.
`smolvm setup --macos` installs the tested Lume version for you, and SmolVM handles it through the commands in this guide. The `lume` login name comes from the desktop account that Lume creates during automatic setup.
## Preview limits
* You can run at most two macOS sandboxes at the same time.
* Each sandbox uses 4 CPU cores, 8 GB of memory, and an 80 GB logical disk. Custom sizes are not available yet.
* Shell commands, SSH sessions, file transfer commands, and SSH tunnels are not available through SmolVM for macOS guests yet.
* Bridge networking, outbound-domain rules, pause and resume, snapshots, and browser sessions are not available for macOS guests yet.
* The prepared image and sandbox clones remain tied to the local Mac.
Review [Apple's software license agreements](https://www.apple.com/legal/sla/) and use a Mac you own or control for permitted development and testing.
## Troubleshooting
Enter only `y` or `n` at `Continue? [y/N]:`. For unattended scripts, approve the one-time image preparation explicitly:
```bash theme={null}
smolvm sandbox create --os macos --name nimble-mac --yes
```
Run the create command again. SmolVM stores a completed restore download under `~/.smolvm/images/macos/.downloads/` and reuses it for the next installation attempt.
Confirm that the sandbox is running, then allow more time for startup:
```bash theme={null}
smolvm sandbox desktop nimble-mac --start --boot-timeout 120
```
Reinstall the tested runtime and check it again:
```bash theme={null}
smolvm setup --macos
smolvm doctor --backend vz
```
Apple allows at most two running macOS virtual machines on supported hardware. Stop one sandbox, then start the other:
```bash theme={null}
smolvm sandbox stop nimble-mac
```
## Next steps
Review the sandbox creation options
Control read-only and writable folder access
Start, stop, inspect, and delete sandboxes
Understand isolation and local access